Want to add a bit of flare to your battleships? Then, here’s everything you need to know about ship-building and ship customization in Starfield.
Bethesda’s latest RPG will take you across the galaxy to find different planets and explore various human settlements. Visiting all the foreign planets in Starfield requires navigating through asteroids across space and sometimes battling other spacefarers and Zealots.
That’s why it is essential for you to keep your ship in pristine condition and install necessary upgrades along the way. Thankfully, Starfield lets you buy new ships and customize your existing ones by changing colors and upgrading their parts. Moreover, you will be free to build your own ship from scratch using the various ship components you purchase.
Having said that, shipbuilding and customization in Starfield aren’t as easy to navigate as one might think. If you don’t know where to start, then we’re here to walk you through the entire process of customizing ships in Starfield.
How to Begin Ship Customization in Starfield

During your travels, you will likely come across various space stations and spaceports that employ ship services technicians. These technicians can assist you in repairing damages and modifying your ships. Moreover, you can also purchase new ships from them.
You will encounter the very first technician after landing in New Atlantis. Simply speaking to him will unlock the ship customization option for your equipped spaceship, also called the home ship. From then on, you can customize your ship through any technician stationed near spaceports around the galaxy.
How to Customize Your Ship in Starfield

Once you select the “I’d like to view and modify my ships” option, you will be taken to the shipbuilder interface that displays all ships you currently own. After cycling through your existing collection, you can select the ship you want to customize by pressing your Start button. This will set your chosen spaceship as the home ship.
Installing Upgrades
By pressing the A button on your controller, you can Upgrade the components of your ship. Once you open the Upgrade menu, you can cycle through all the essential parts that are currently attached to your ship and replace them with upgraded versions with better stats.
However, these upgrades will cost you an arm and a leg, so we advise you to invest accordingly. Moreover, they will also add weight to your ship, so you’ll essentially be trading off mobility for every component you add.
Ship Building
If you press the X button instead, you will be taken to the Ship Builder menu, where you can individually drag, drop, and attach various parts of your ship and tweak their placement to your liking.
This ship-building section allows for some extensive customization, as you can virtually change or replace all the components of your ship. Moreover, you can also attach various weapons to your ship from this menu, including Missile Launchers, Pulse Lasers, Auto Cannons, and more.
And while some parts outperform others in terms of functionality, others exist solely for cosmetic purposes. That said, essential components such as engines and shields cannot be seen from the outside. So, we would advise players to focus more on functionality than looks and spend resources accordingly.
Changing Colors
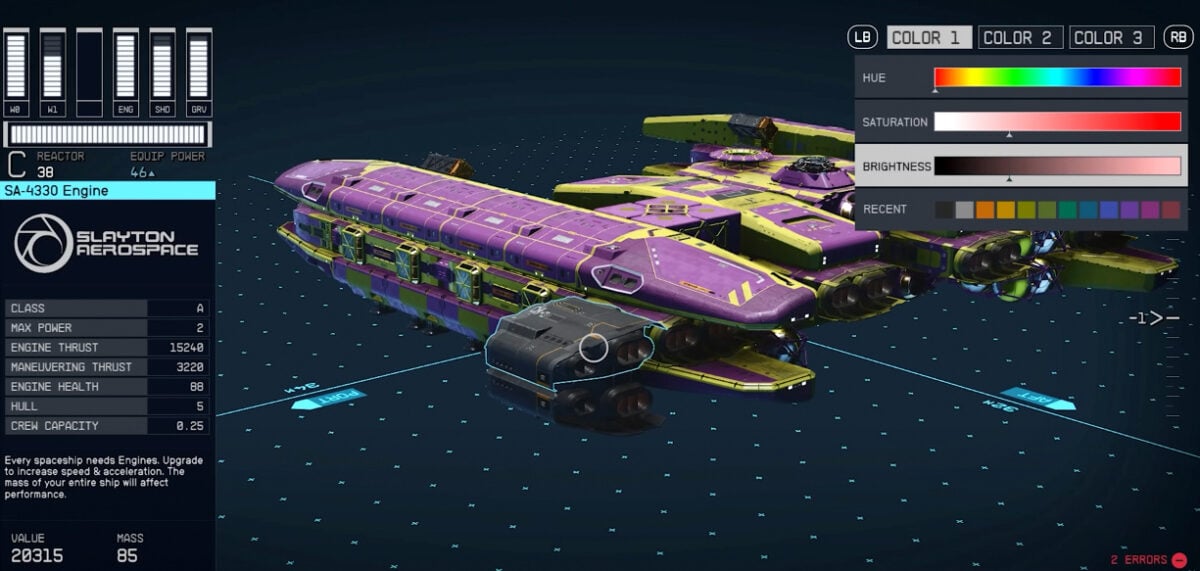
While inside the Ship Builder menu, you can hover your pointer over a certain ship part and press the L3 button to change its color. What’s great about this feature is that you can pick any custom color from the color wheel instead of assigning preset colors to your ship’s components.
Moreover, once you pick a color, you can change its brightness, hue, and saturation. And if you’re worried about losing the color you just created, don’t worry because they will be saved as colored tile presets in the Recent tab. Sadly, the colors will disappear once you exit the editor.
So, the only way to restore the color scheme you just created is to pick the color from an existing component, readjust slightly, and revert back to the original so that it shows up on the Recent tab again.


